
Autumn Flower Arranging
October 05, 2017
Now I'm no florist but I do know two things;
1. Bouquets are pretty and
2. Bouquets cost an absolute fortune
If you follow me on insta, you've probably noticed my love for flowers creeping it's way into my gallery every so often. Totally disrupting ~ the theme ~ I know, but I just can't help it, they're too damn pretty. But what graduate has the cash to splash on a brand new bunch every week? Not me anyway. So, my mum suggested we buy a couple of cheap bunches in Tesco and grab a few bits and pieces from the garden in an -attempt- to jazz up a very average bunch of flowers from the supermarket.
Before we ventured out into our soggy garden in our wellies and raincoats (yes like paddington bear), I did a lil research and found some ahhhmaaaazing tips and tricks to make a successful bouquet. Basically, you need four types of plants to balance out the height, shape, colour. Here's what you're looking for:
Foliage - Lots of green. Leaves like laurel frame the bouquet and act as a backdrop for the colours to work against.
Height - Next step is height. Taller flowers go towards the back to give the arrangement more dimension.
Focal - The main flowers, the pop of colour. The focal point of the arrangement! In our case, the flowers we bought in tesco.
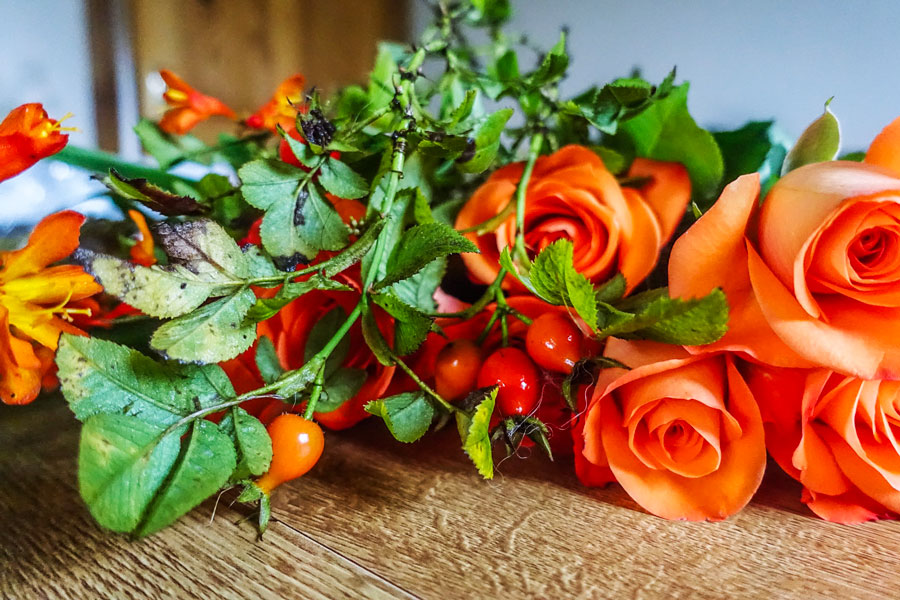
Fillers - Check out where in your arrangement is looking a lil sparse and throw some 'fillers' in. Baby's breath (Gypsophila) seems to be the go-to filler but we also used berries of similar colours to the flowers, which resulted in very seasonal outcomes for each arrangement.


We made sure to give the foliage a good shakin' to get rid of the creepy crawlies before heading back inside. I was extreeemely adamant about this, to the point where I was still paranoid about sleeping with either of the end products in my bedroom.
Ok, so now that's all sorted, it's time to get arranging! Before Pinterest, I was under the impression that everyone just plonked everything into a vase and messed around with it until it looked half decent. But surprise surprise, I was wrong (& trying to make my life harder than it needed to be). There's a system guys. A GRID system, where you stick a couple of strips of sellotape over the top of your vase, creating a grid-like template. This is mainly for people who weren't prepared enough to have pre purchased oasis, but it's a super effective quick fix.

I understand this may look reallllly silly to some of you, but for someone who could do with a little order for their first time round, I'd recommend it. Plus, if I tried to freestyle it, it would probably end up like a mini rain forest. And I know bouquets aren’t always meant to be totally structured but it's a good guide.
So we starting filling our vases, being sure to cut each stems at a 45 degree angle to increase the surface area, allowing each flower to absorb as much water as possible. Taller foliage goes in the back, smaller ones at the front, you get the picture.
This time, I wasn’t too sure if mixing the focal flowers would work well so we stuck to jazzing up our original bunches. Because of this, our arrangements turned out looking rather seasonal. Orange for Halloween and red for the winter months. Of course, additions like berries and dark greens contributed to the -festivities- of it all also.


Next time I'd like it to be more spontaneous, maybe try a variety of flowers per arrangement and experiment with mixing colours. I think the orange arrangement is my fave, probably because I'm SO ready for Halloween. Which one do you guys like most? I'd love to hear!


2 comments
Such gorgeous flowers, I especially love the orange range too! x
ReplyDeleteNev | Miss Nev
I really love it your ideas and post. I find them extremely informative and interesting.
ReplyDelete